Hey there, fellow plumbers! 🛠️
If you're looking to enhance your plumbing business in 2024, you're in the right place. In today's digital world, having a strong online presence is crucial, and Google Ads can be your secret weapon for attracting new customers and growing your plumbing business.
In this guide, we'll cover everything you need to know about plumbing business marketing. Using Google Ads for plumbers, you can reach your ideal customers right when they need your services.
Whether you're new to plumber marketing or looking for ways to improve your marketing for small business, this tutorial will provide you with valuable insights and tips.
By following these steps, you'll learn how to use Google Ads to increase your online visibility, generate leads, and grow your plumbing business. Let's get started on this journey to mastering Google Ads for plumbing businesses.
So, grab your tool belt and let's dive into this Google Ads Tutorial!
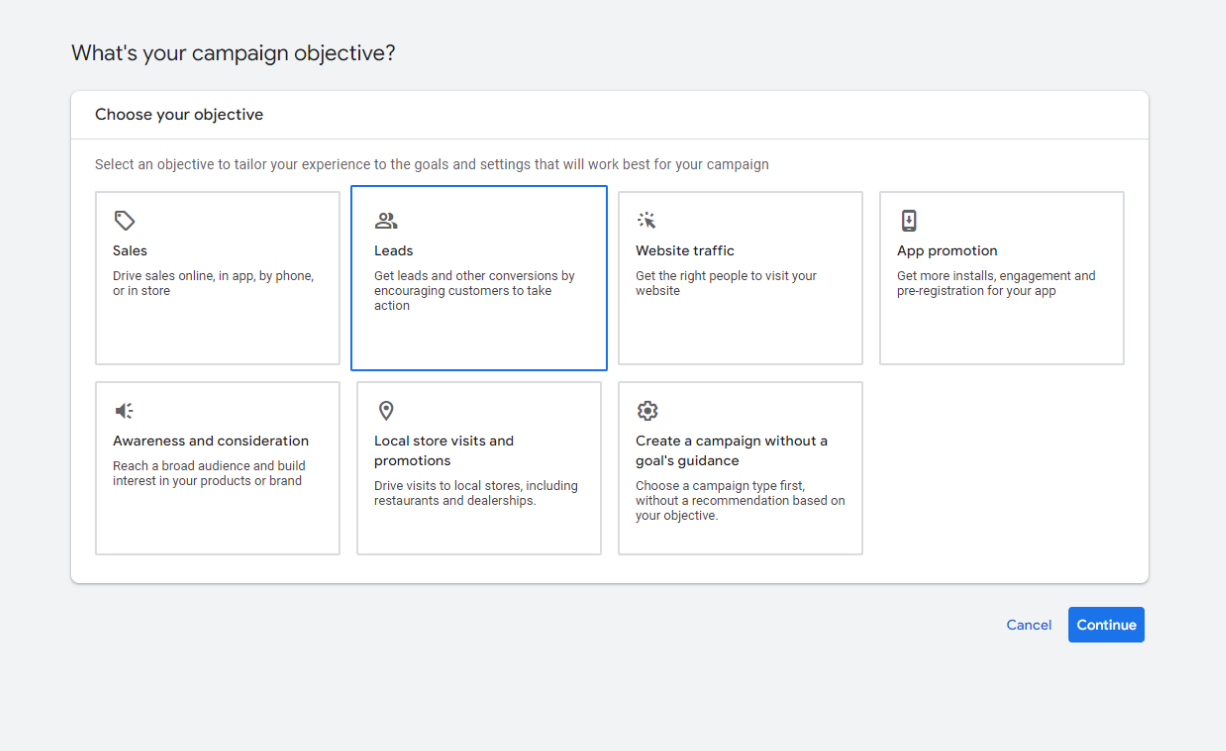
After you click on creating a new advertising campaign, you need to choose
"Campaign Objective".
In our case, we will use "Leads" - We want to let Google know exactly what we need.
Select "Leads" and click "Continue".
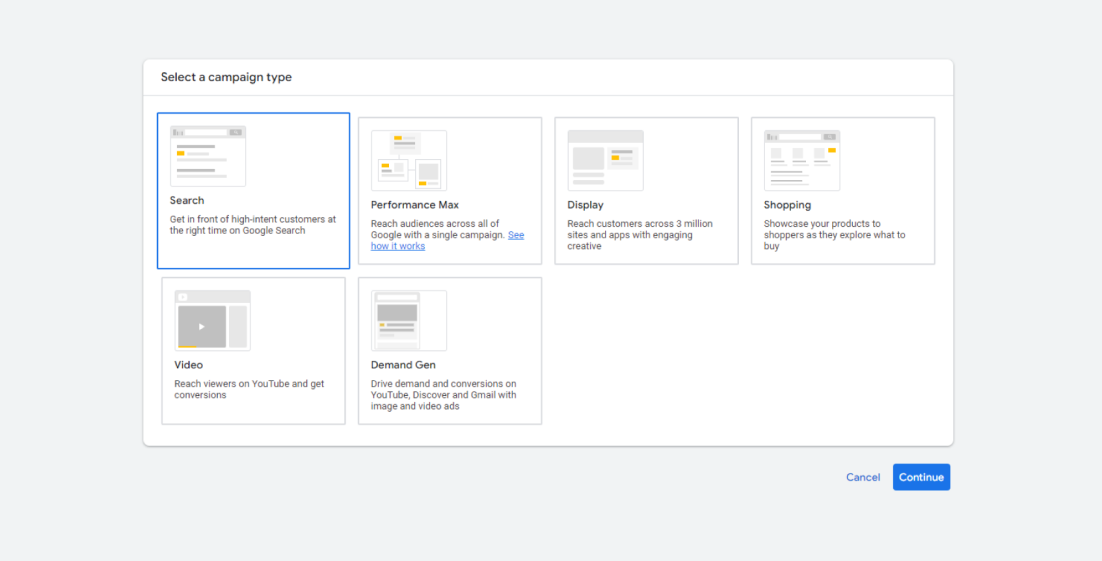
Choose the "Search" option as it best suits us. We will only have clicks from those people who are genuinely interested in plumber services. Click "Continue".
Under "Select the ways you'd like to reach your goal":
🔲Website visits
🔲Phone calls
🔲Store visits
🔲App downloads
🔲Lead form submissions
For now, we can leave it blank and click "Continue".
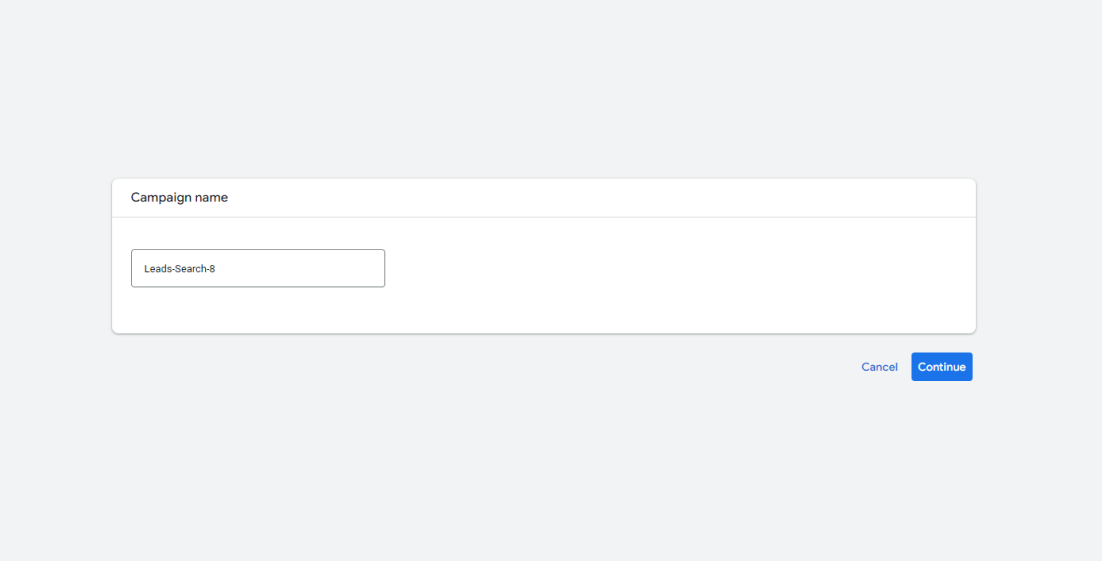
Next, there will be a section to choose the name of the advertising campaign - Enter what you want, for example, "Plumbing Services," or you can leave the option suggested by Google and click "Continue".
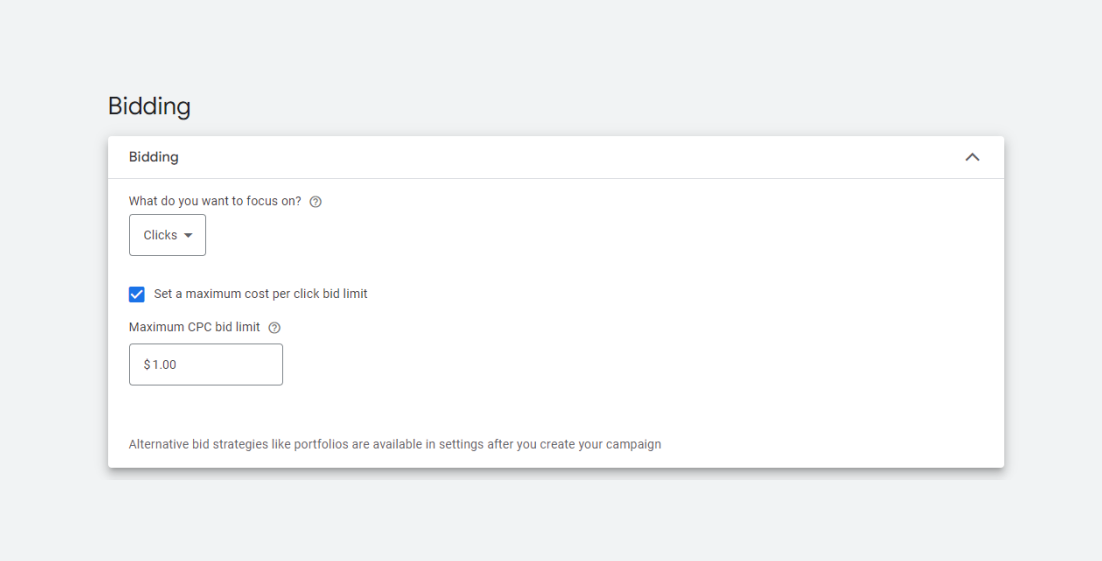
In the Bidding section, select "Clicks" - click to activate the "Set a maximum cost per click bid limit" option - enter the number $1.00 for now (we will adjust this later).
In the "Networks" section - We need to uncheck the boxes for "Search Network"
and "Display Network" - the thing is, we don't need low-quality leads.
If we don't remove this option, people who aren't particularly interested in your services might click on your ads.
🔲Search Network
🔲Display Network
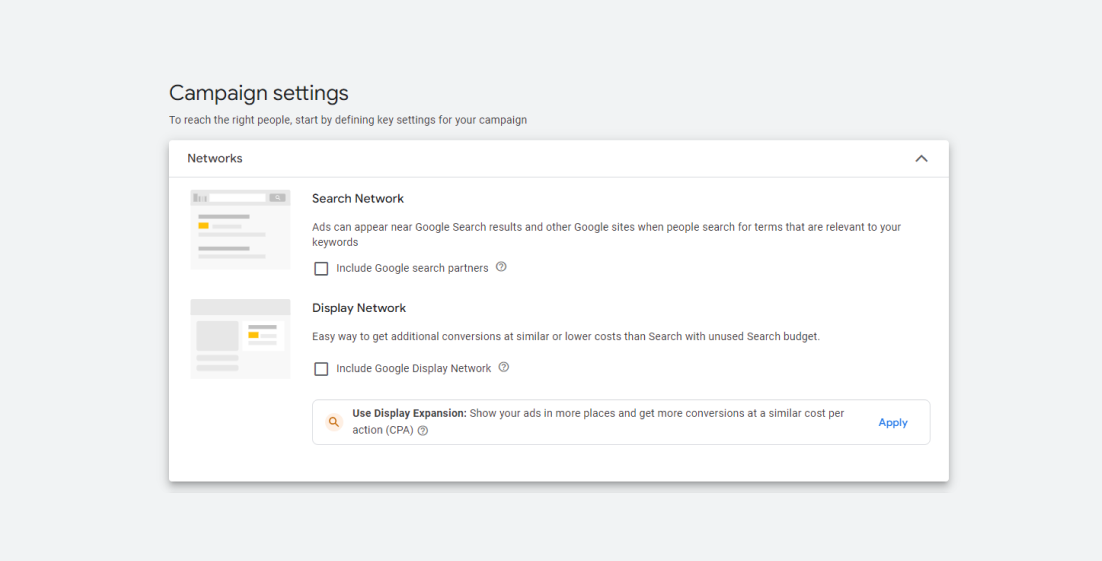
Uncheck these boxes and move on to the "Locations" section.
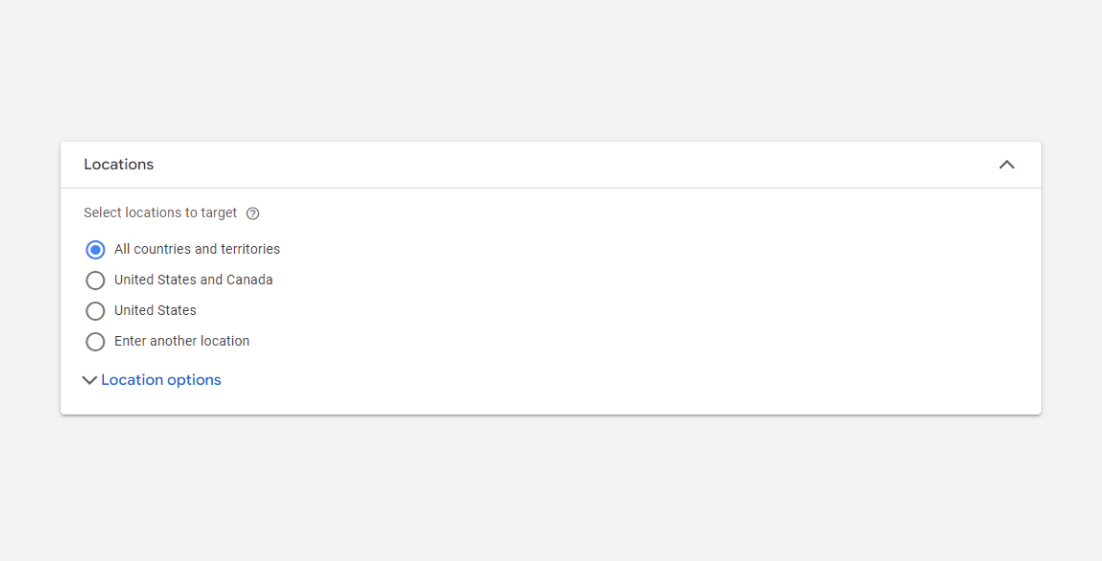
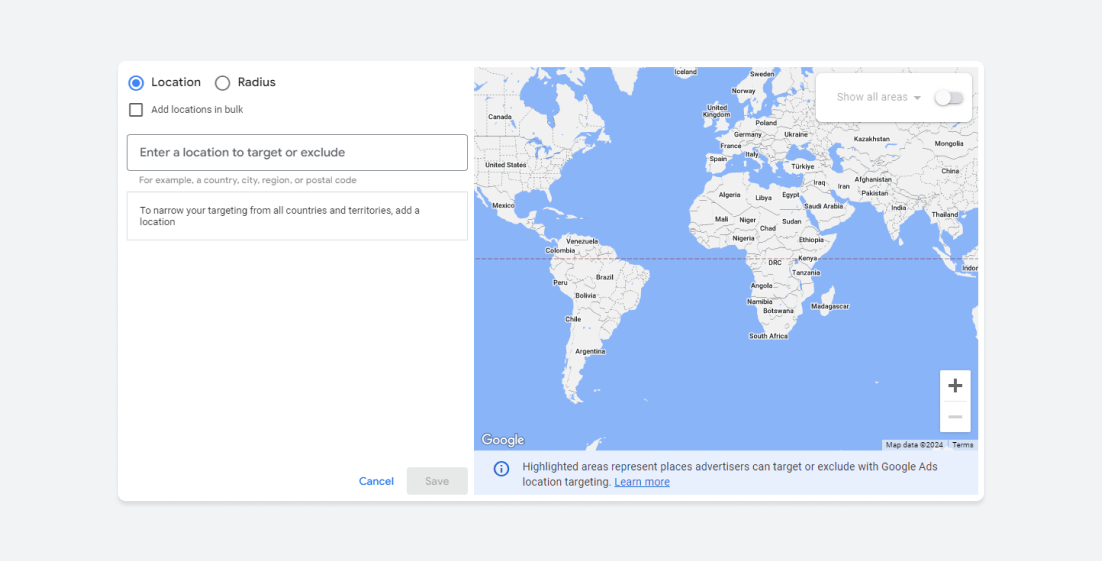
In the "Locations" section - We need to select "Enter another location" and choose "Advanced Search".
In the pop-up window, we need to select a location.
You can enter either the name of a whole city or ZIP codes or County / State.
You can choose one or more locations.
You can enter city names / ZIP codes manually or select the "Radius" option, for example, set the city as "Austin, Texas" and choose "10 miles" around it.
Then, your ad will be displayed within a 10-mile radius of the selected center,
in our example case - 📍 Austin, Texas.
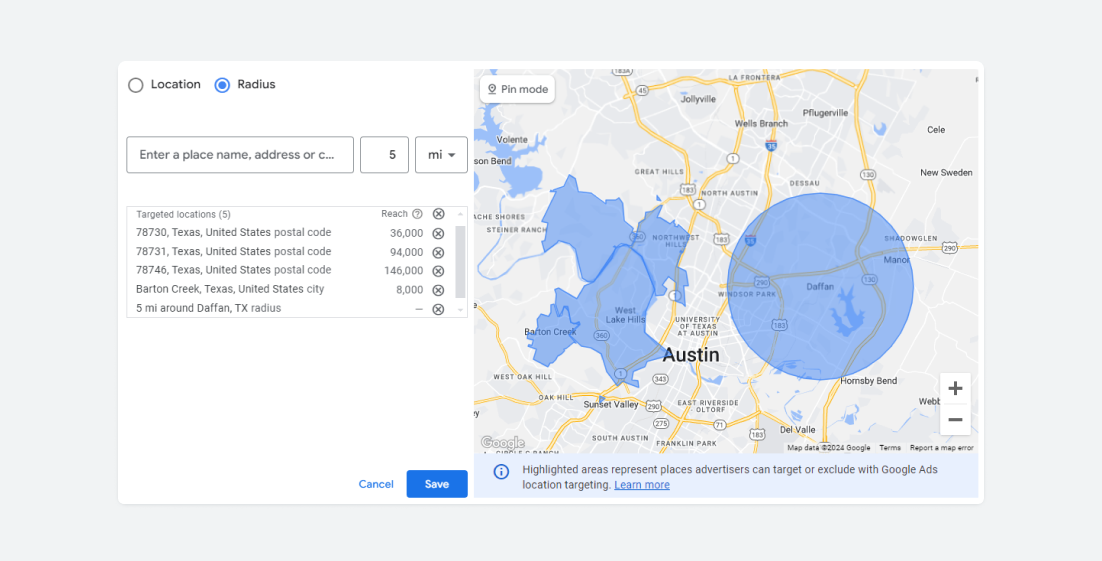
This is just an example. You need to set it up how you need.
After you have finished selecting the locations, click the "Save" button.
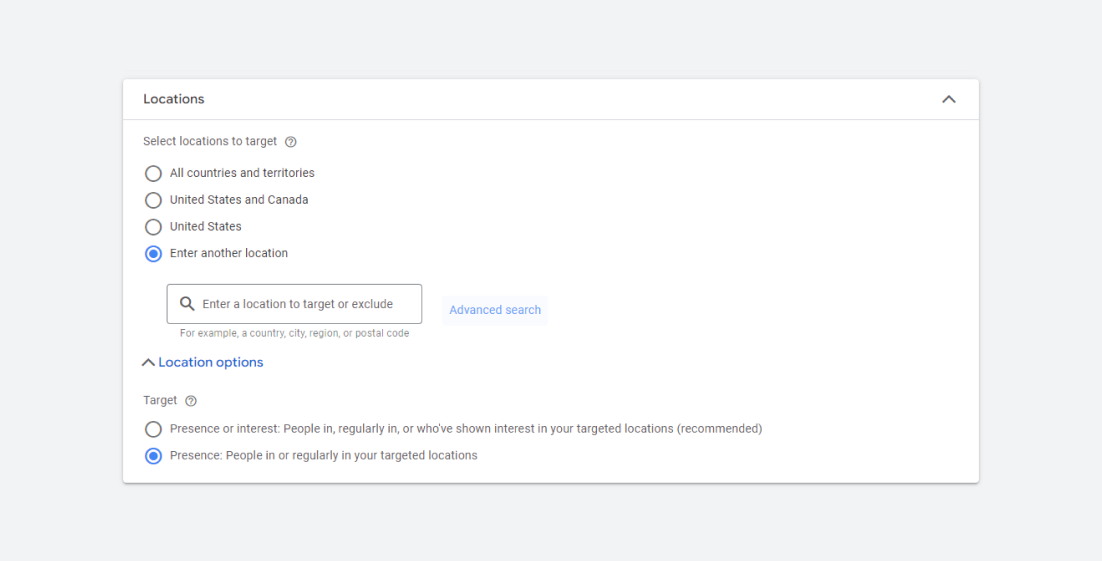
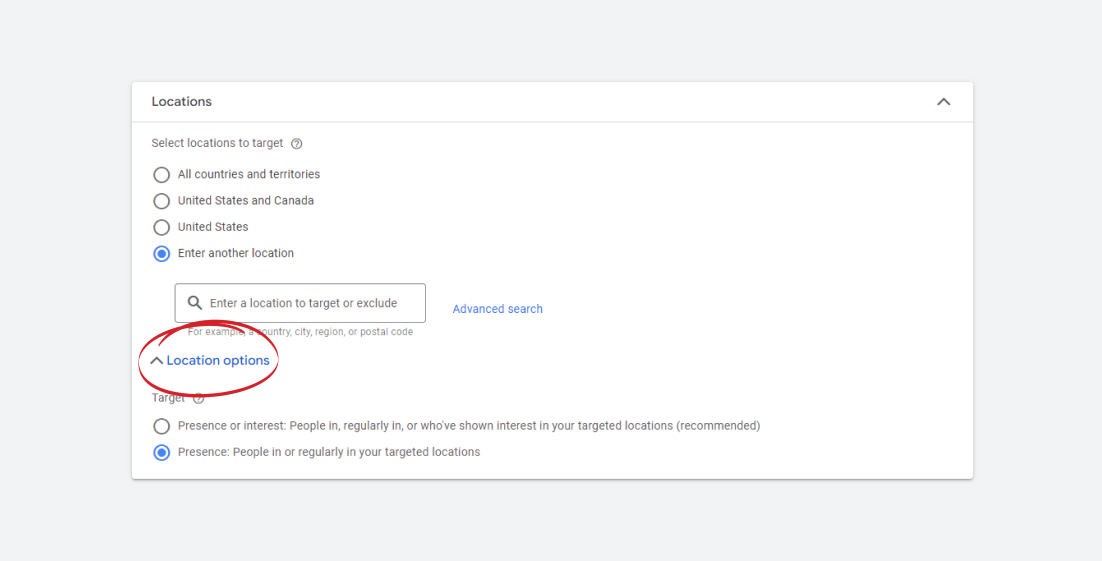
VERY IMPORTANT STEP!
In the appearing window, you'll see a dropdown menu titled "LOCATION OPTIONS" - Open this menu and select "Presence: People in or regularly in your targeted locations."
This is a crucial point. If you don't choose this option, your ad might be displayed to people who aren't even in the area where you serve customers.
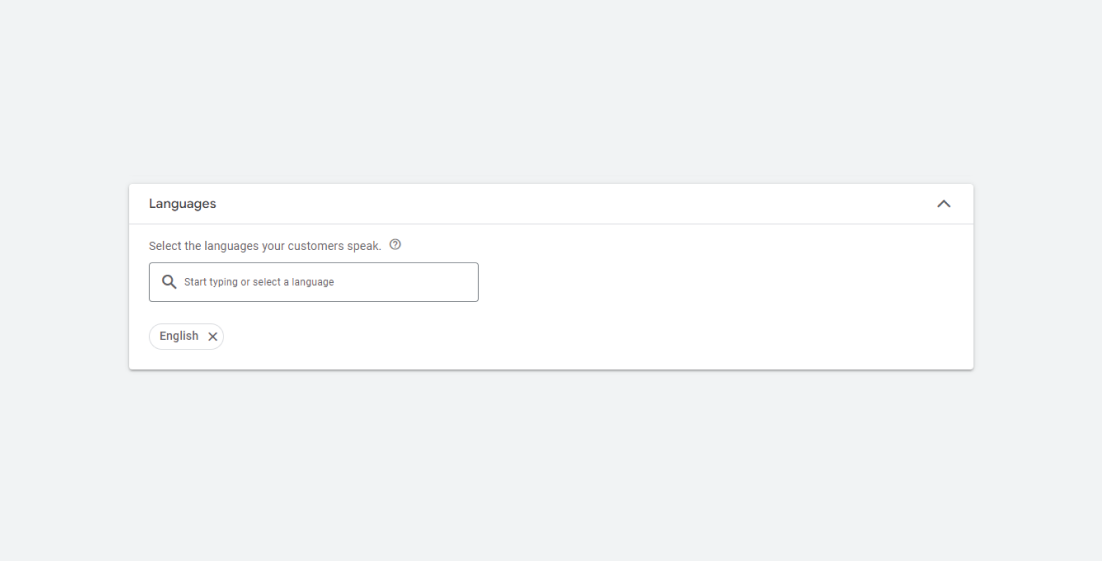
Initially, "English" is selected.
In general, you can add additional languages if you want, or remove "English," and then your ad will be shown on devices with all languages.
For example: I use my phone in Russian / German / French, it's not very important - if I enter a query like "plumber near me," your ad might not appear on my device because my system language is, for example, "German."
Personally, I always remove "English" option, that my ad is visible to everyone - this will increase the ad's reach, but you can leave it - it's not very important.
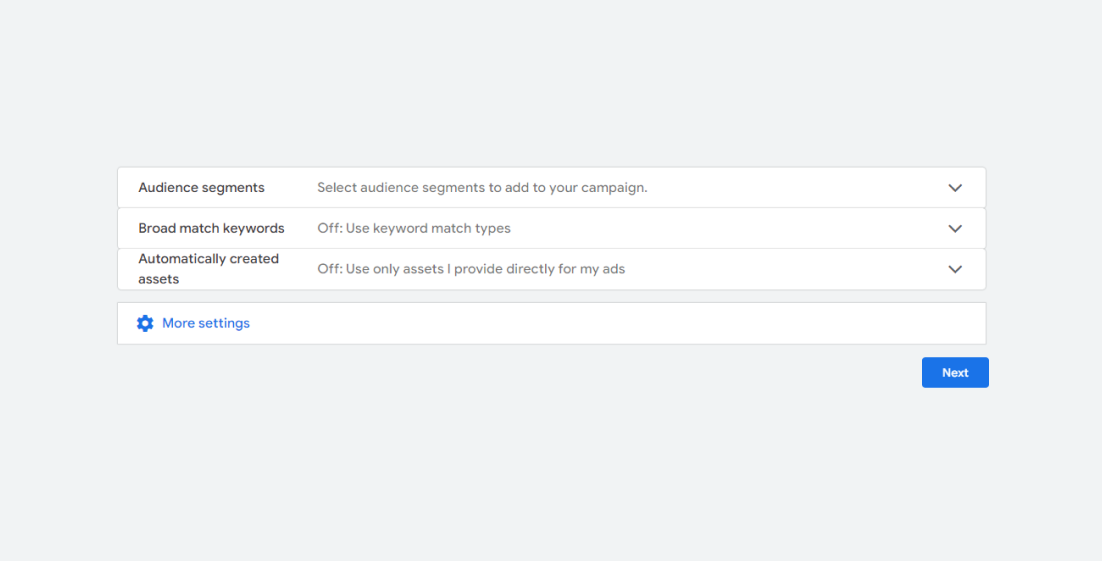
Audience segments - Not touching.
Broad match keywords - Not touching.
Automatically created assets - Not touching.
Going to "⚙️ More Setting"
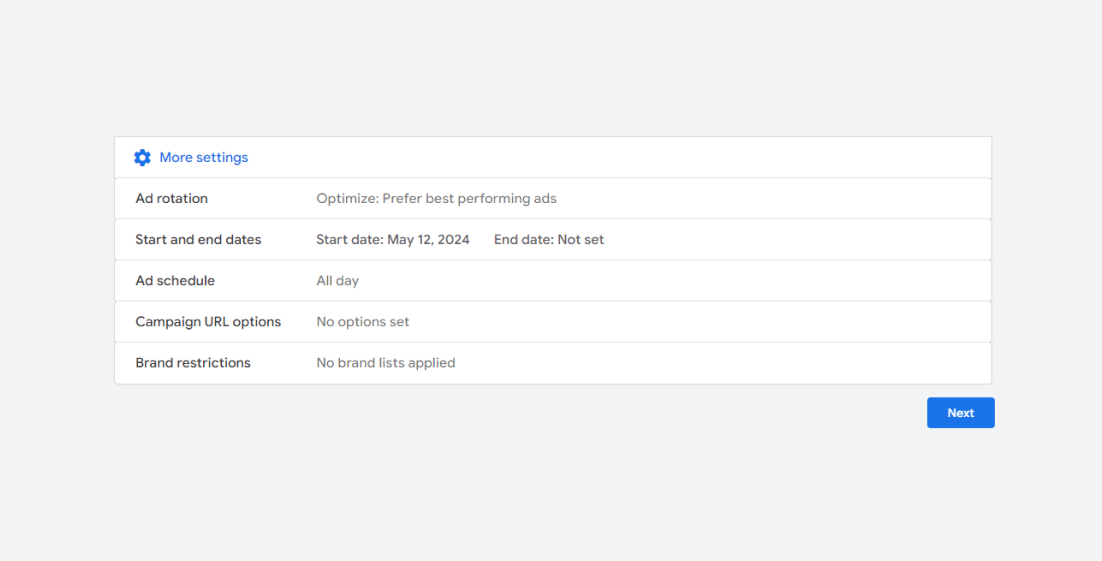
It's crucial to set the exact time when you can take a call from a client.
For example, you can choose:
"Mondays - Fridays" from 8 AM to 5 PM.
"Saturdays - Sundays" from 10 AM to 3 PM.
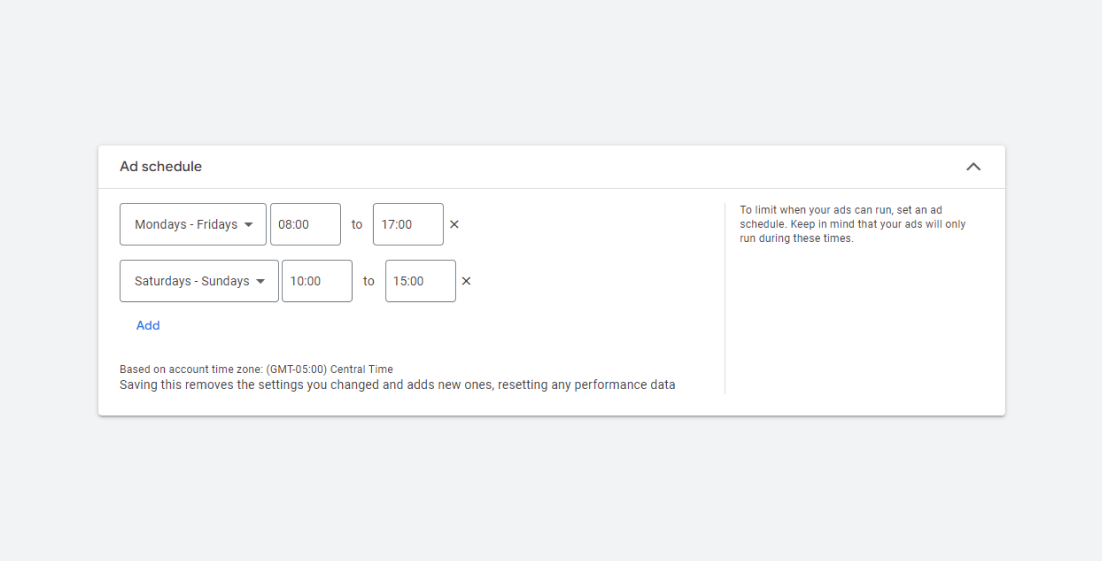
Once you've set your preferred time, click on "Next"

8.1) Here we need to write the name of our advertising campaign, for example:
"Plumbing General" - I'll tell you a bit later about advertising options (Ad Groups).
For now, let's make a general name to avoid confusion.
Change Name by clicking on "✏️" icon.
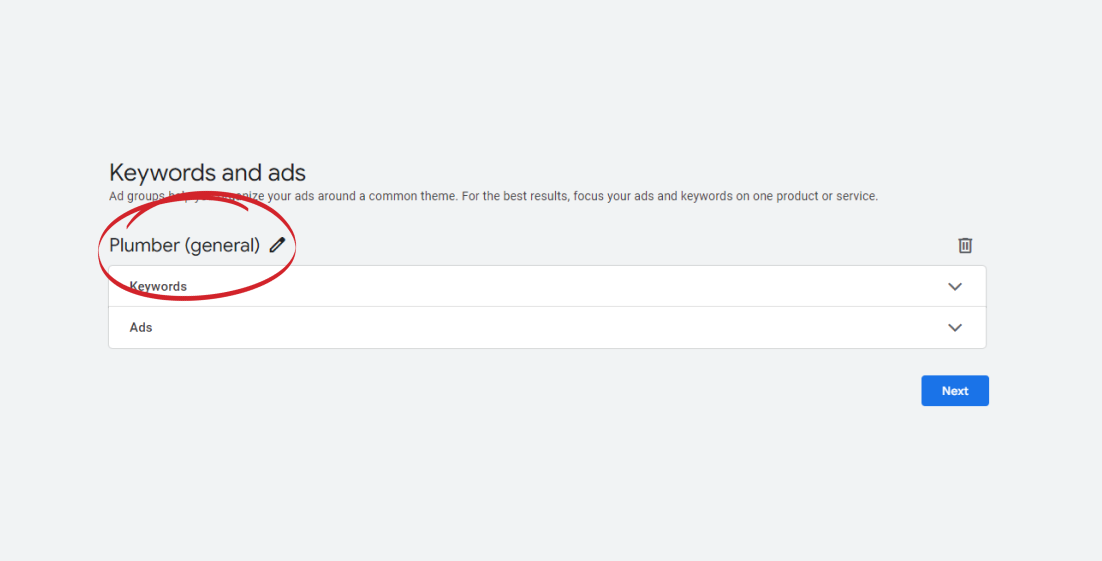
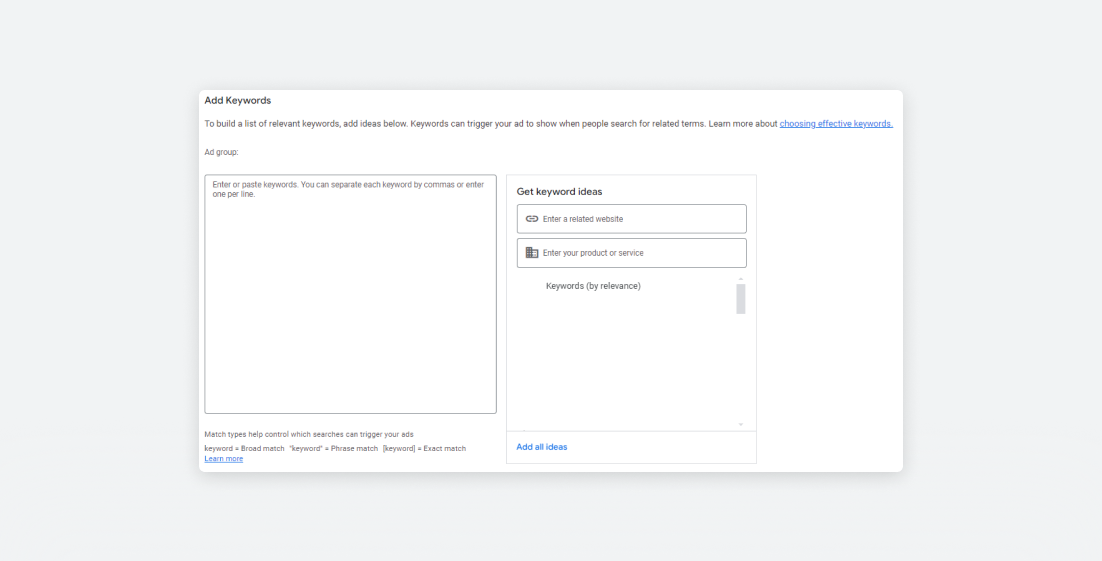
8.2) Open the "Keywords" section.
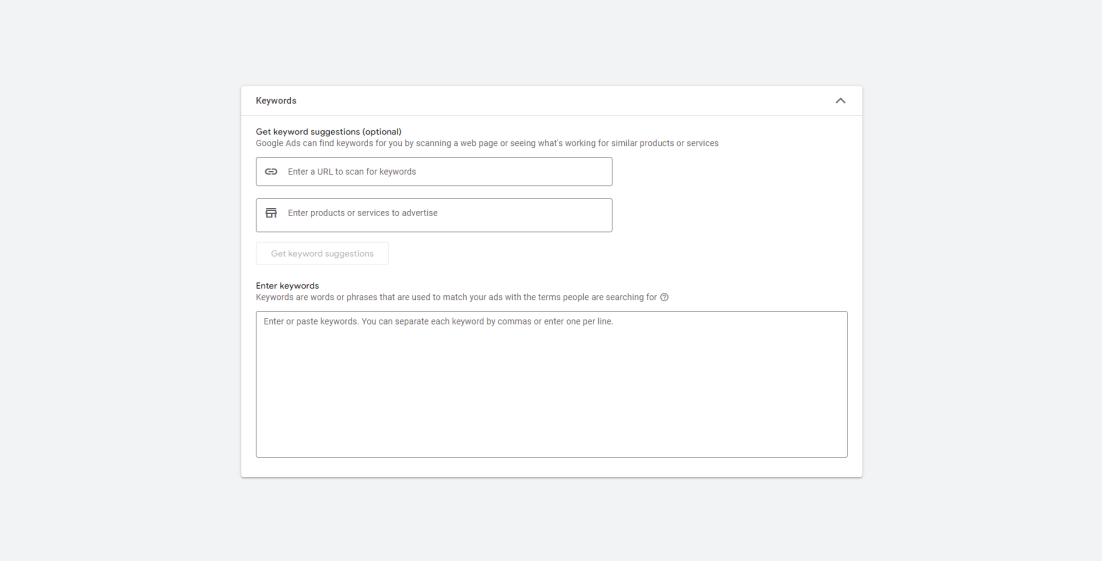
In the opened window, we need to enter our keywords in the "Enter Keywords" section.
Important! Before we start entering our keywords, we need to understand what exactly someone who needs plumber assistance is searching for.
What query are they entering?
Later on, we'll use the "Keyword Planner" tool to understand this and select the best keywords for our advertising campaign.
But for now, let's talk about how keywords work and what queries we can target.
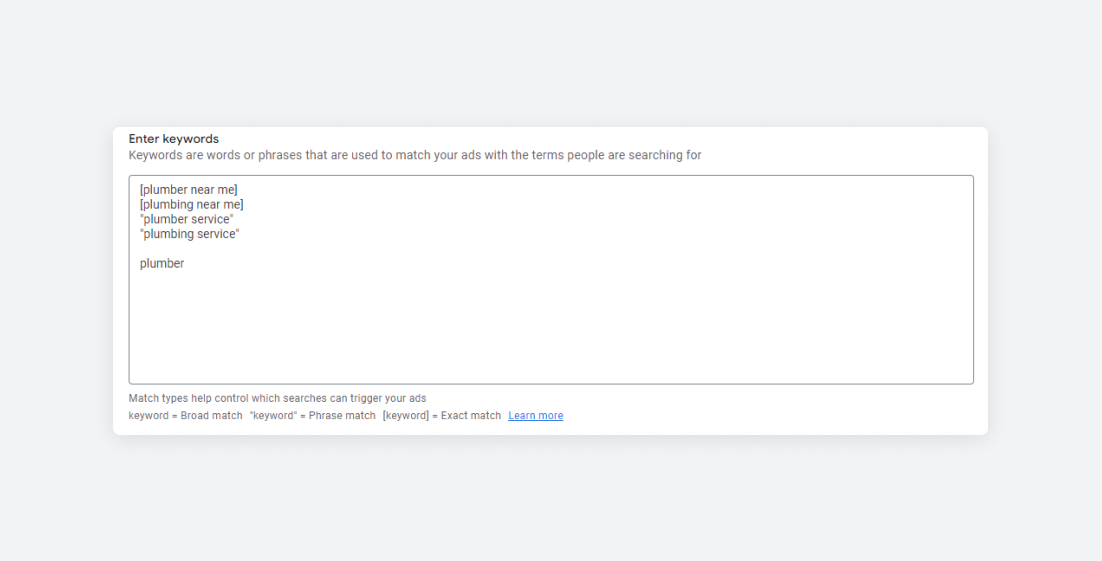
I have entered the following keywords at the moment:
[plumber near me]
[plumbing near me]
"plumber service"
"plumbing service"
plumber
You may have noticed that I am using symbols like- [ ] and (“ ”) and 1 word without.
What does this mean?
The thing is, by doing so, we indicate under which search query we want our ad to appear in Google Search.
1) Exact Match
If we put our keyword in [keyword], these square brackets, we let Google Ads know that this is our Exact Match - if a user enters PLUMBER NEAR ME in the search bar, our ad will be displayed for this exact query.
2) Phrase Match
If my keyword is in “keyword” (Quotation marks), it's called Phrase Match, which means that our ad may appear when someone types this keyword and something else.
For example: PLUMBING SERVICE in Austin Texas - if someone enters a similar query, the trigger for the keyword "PLUMBING SERVICE" will be activated, and our ad will be shown to the person.
What about words without any elements?
3) Broad Match
This keyword is called Broad Match - a person can enter a query that doesn't bring us any financial benefit, for example, “Plumber fixing pipes watch youtube” - our ad will trigger on the word “PLUMBER”, the ad will be shown to the person, but it doesn't make sense. If a person clicks on your ad - they are unlikely to be a potential customer.
That's why we need to remove it.
Therefore, it is very important to enter the correct keywords and use [Exact Match] and “Phrase Match”.
Our keywords should look like this:
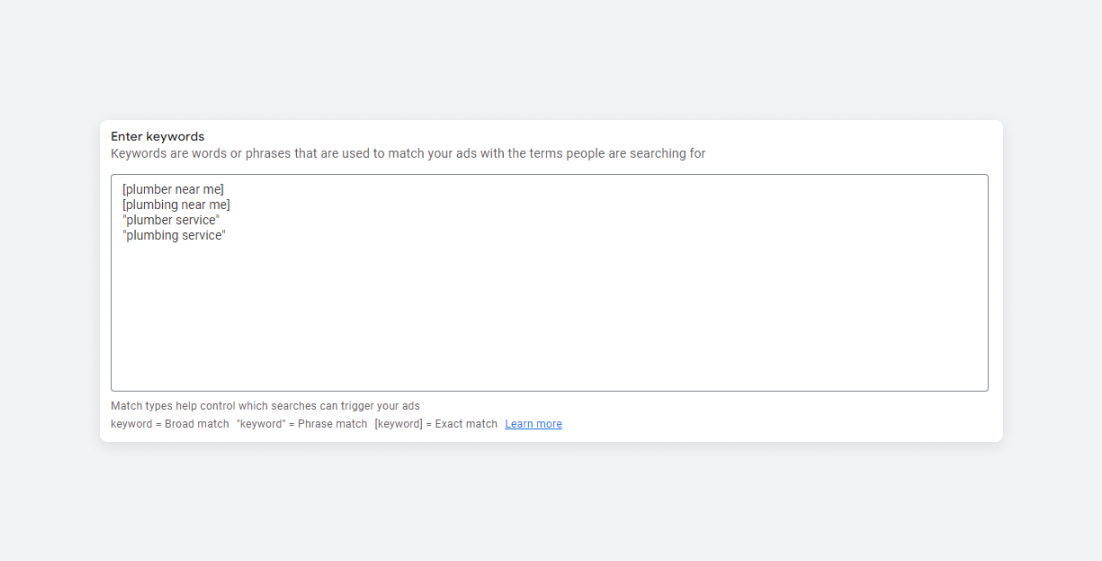
[plumber near me]
[plumbing near me]
"plumber service"
"plumbing service"
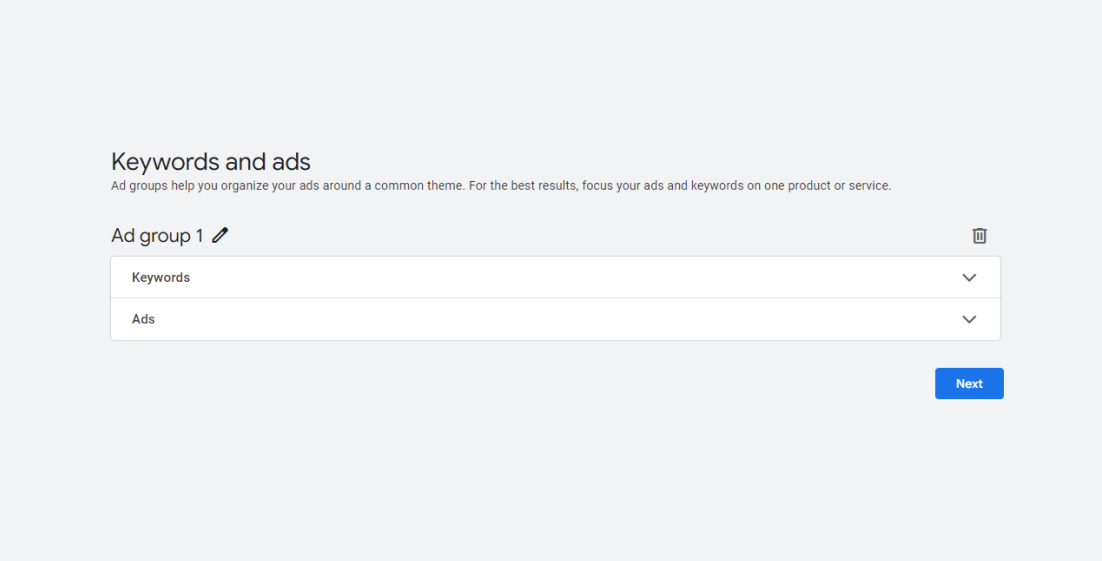
After you finished with keywords: Open the "Ads" section.
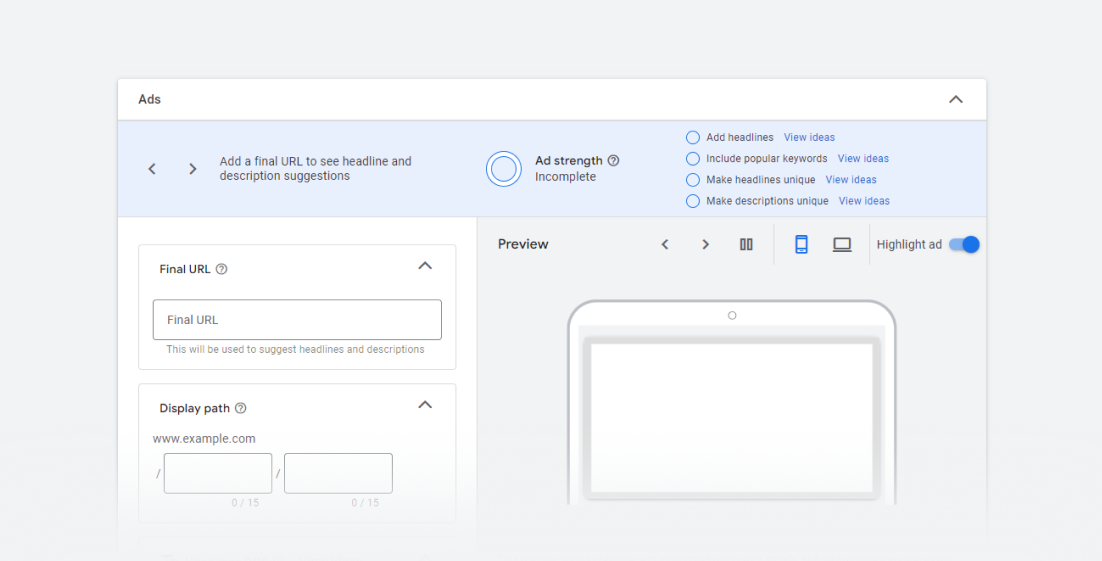
Here, you need to specify the link where you want to direct people from the ad - your website.
A little aside - It's important to have two types of websites: your regular website (with detailed information, your history, etc.) and a "Selling Site" we call it - "Landing Page".
What's the difference? The regular site that doesn't aim to sell something, your main site, is more informative with minimal call-to-action buttons (for example, "Call Us Now") etc.
A Landing Page is a very small website page created specifically to SELL something.
This page highlights only the most important and necessary aspects of your services;
- Very brief description
- Services
- Achievements
- Reviews
- Contact form
And as many (just don't overdo it 😄) Call Buttons as possible for people to call you right away.
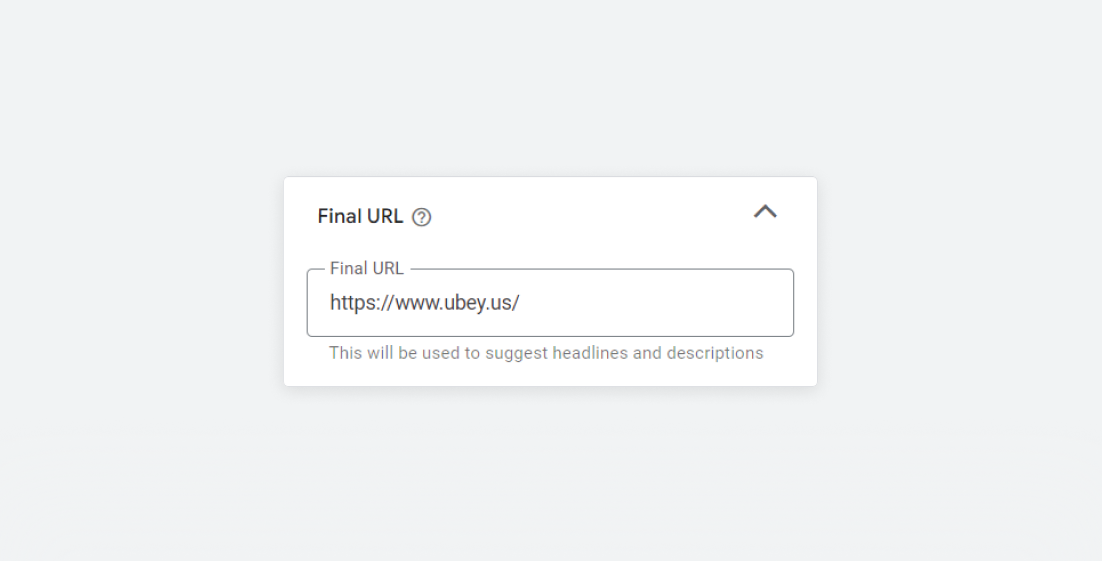
Back to the point, after you've added the page where you want users to land after clicking the ad - move on to the next item.
So, for example I'll write in there:
https://www.ubey.us/
This point is like additional keywords for us.
When a user clicks on this link, they'll go exactly where you specified in the "Final URL" - in the "Display path," you can specify additional important keywords.
Example:
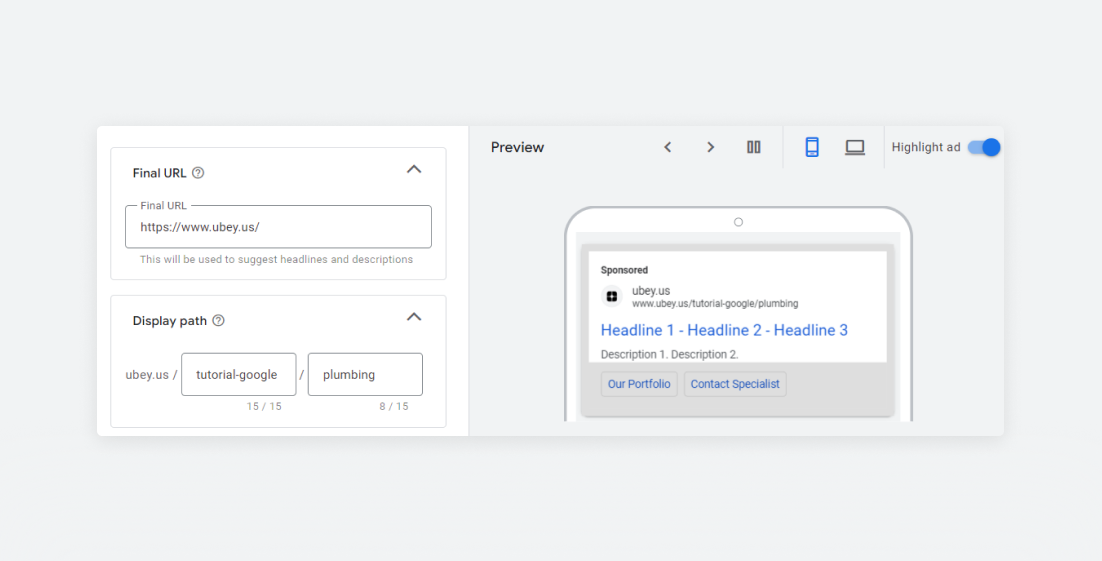
If you click on this link, where will you land?
Clicking on this link will take you to the website "https://ubey.us/".
The words after "tutotial-google/plumbing" only serve as keywords.
The user should see what they are looking for already in the link provided.
Back to plumbers - we can write something like:
plumbing-austin/plumber-service
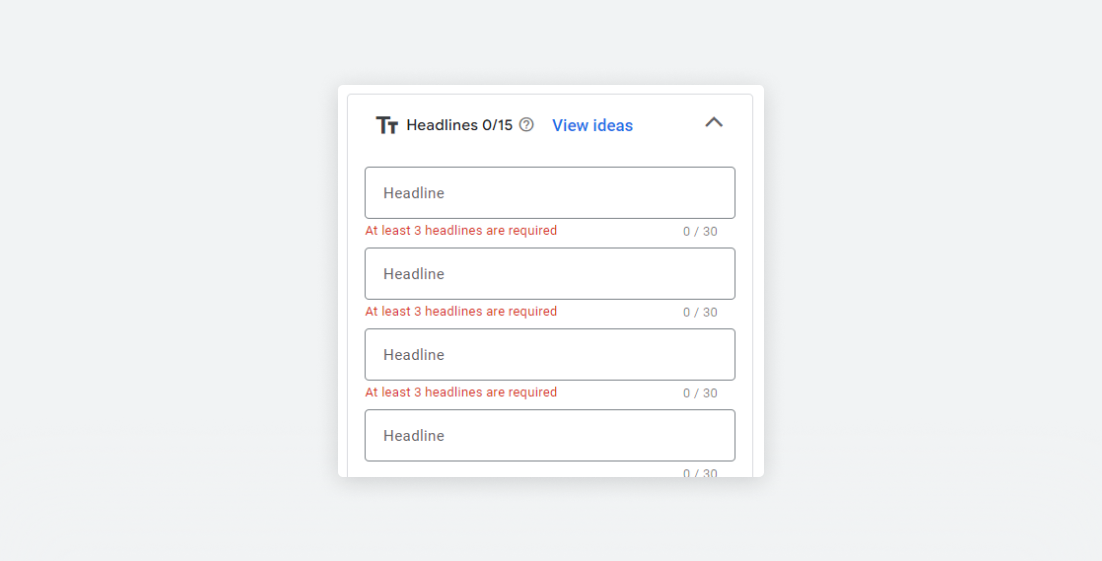
This is what the user will see as the title of your ad. It's your main text.
This is a very important point; we need to make the headline unique and attractive to someone looking for plumber services.
We can enter something like:
#1 Awarded Plumbing Service
30 Years in Business | Austin
100% Free Estimate Call Us Now
Fill in the top 3 headlines.
Now we need to pin them to our ad.
Next to each headline, there is a "📌" icon, we need to click on it and select the position where this headline will be displayed.
In our case, we choose:
Position 1: #1 Awarded Plumbing Service
Position 2: 100% Free Estimate Call Us Now
Position 3: 30 Years in Business | Austin

Now, when our ad appears in the search, its Headline will look like this:
#1 Awarded Plumbing Service - 100% Free Estimate Call Us Now - 30 Years in Business | Austin
Fill in the remaining Headlines, but don't pay much attention to them.
They won't be displayed in our ad.
This is necessary so that we can easily launch our Google Ads.
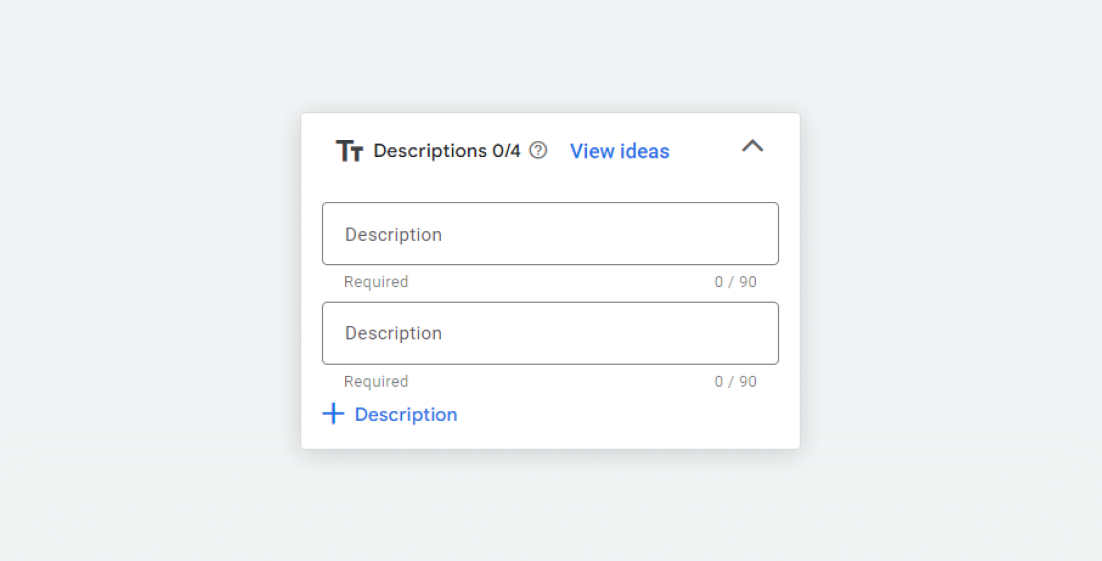
After we've finished with the Headlines, we move on to the "Descriptions" section.
Here, we need to provide information that is useful to the customer and also include keywords and calls to action.
Try to fill in as much as possible. Aim to get close to the maximum character count - 90.
Fill in only 3 lines.
For example:
Line 1: Emergency Plumbing Service - Licensed Plumbers, Fast Response, Affordable Rates – Call Now
Line 2: Our Plumbers Providing Quality Workmanship | 24/7 Service | Quick Fixes Whenever You Need
Line 3: Dependable Solutions for Any Plumbing Issue - Trusted Professionals Ready to Assist!
Now, similar to Headlines, we need to pin these lines by clicking on the "📌" icon.
Pin your 3 Descriptions in the required order and write anything in the 4th line. It won't be displayed if you pin the previous 3.
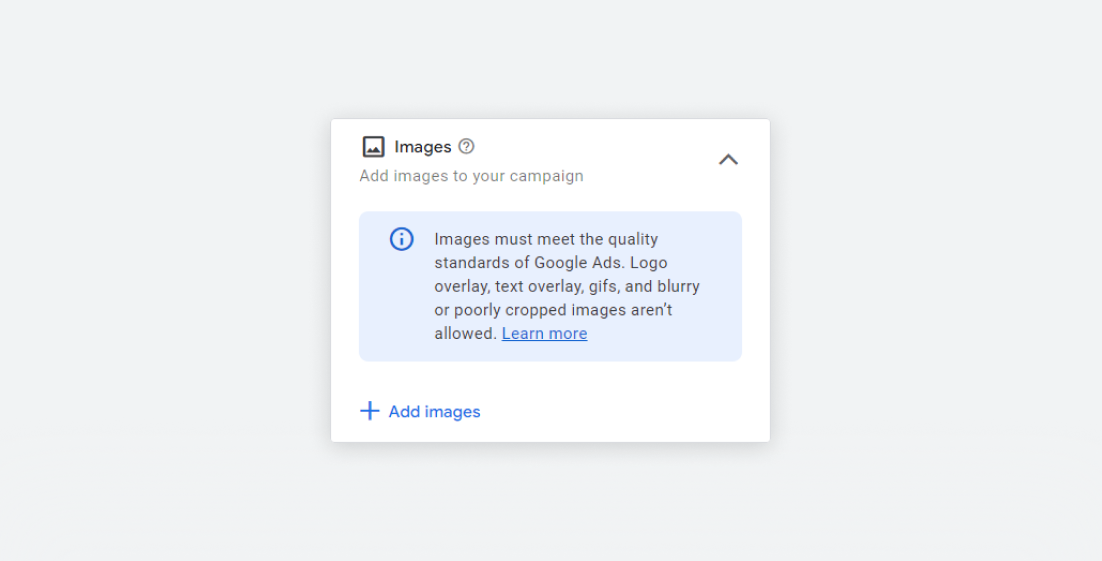
Choose a suitable image and upload it.
Nothing complicated here.
You'll need 2 images - one square and one horizontal.
For now, you can skip this. You'll need to verify it later. You can move on to the next step.
If you've already verified it, enter your company name in the field and proceed to the next step.
Add your logo (square) and move on to the next section.
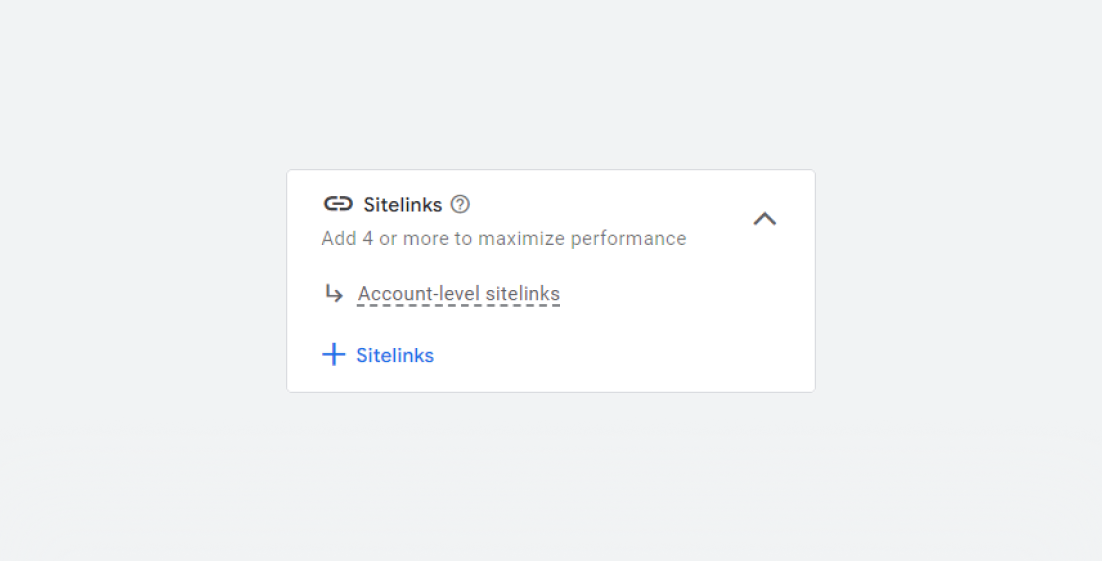
Click on "+ Sitelinks" - in the opened window, click on "Create".
Fill in all 4 fields.
For example:
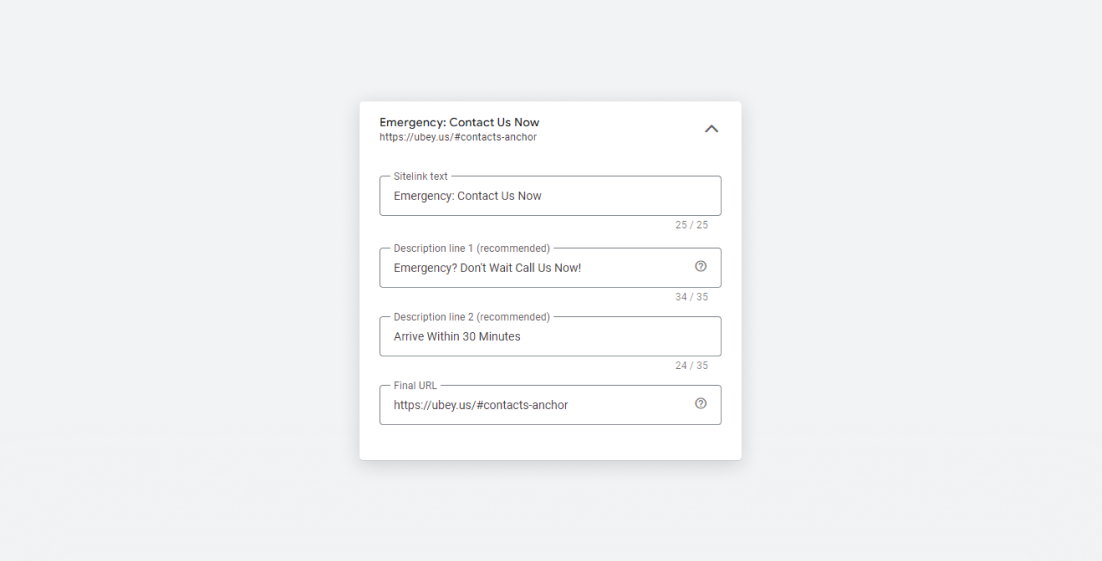
Sitelink Text: Emergency: Contact Us Now
Description Line 1: Emergency? Don't Wait Call Us Now!
Description Line 2: Arrive Within 30 Minutes
Final URL: Here's a little lifehack: Ideally, you should specify a link that DIRECTLY leads to the desired section, rather than opening your regular website page.
To do this, you need to add a link with a path, for example: https://ubey.us/#contacts-anchor
How to get this link?
1) Go to your website / Landing Page
2) Hover your mouse over the menu section, for example, "Contact Us" - when you hover your mouse, you'll see the text with the direct path to this block at the bottom left of your browser. (see below)
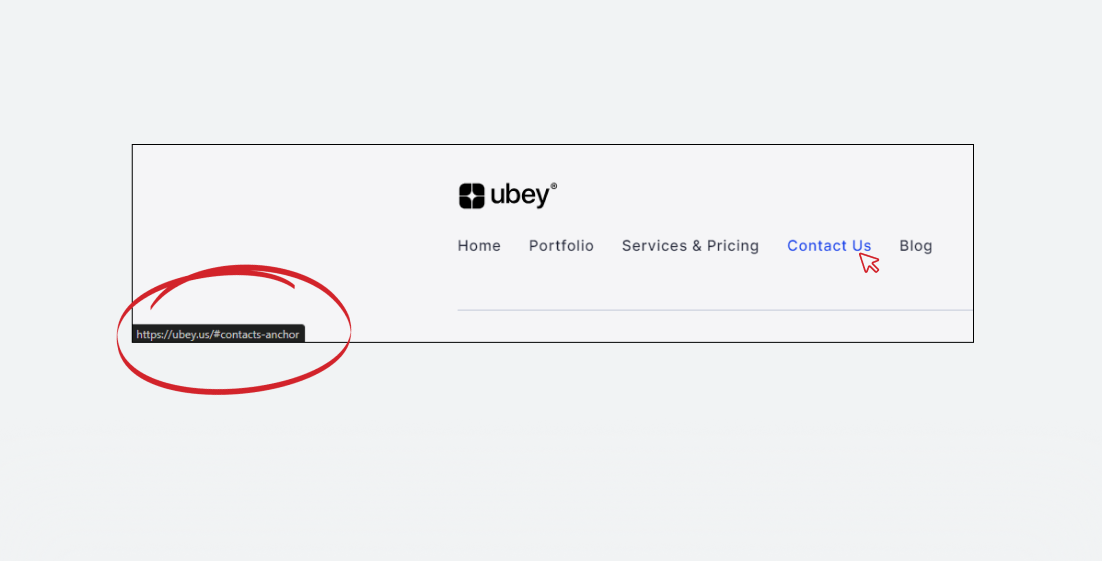
3) Write this link in the Final URL - Then the user will land directly on the necessary form when clicked.
I advise creating only important Sitelinks; don't list your social networks, blog, etc.
Make buttons that contribute to closing the deal, for example:
1) Contact Us
2) Our Reviews
3) Work Showcase
4) Get Free Estimate
When you fill in all 4 Sitelinks, move on to the next step.
This works as additional keywords.
Write text that encourages action.
For example:
1) Emergency? Call Us Now!
2) Only Certified Plumbers
3) Affordable & Relible
4) Working 24 Hours Call Now
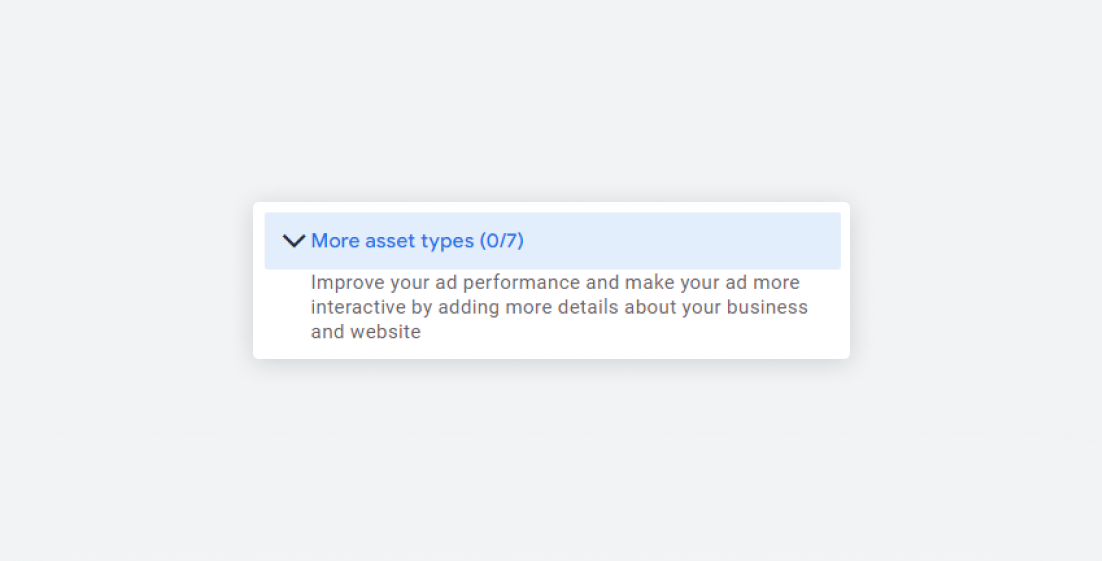
Note: Right now, we're creating a "General Ad" as discussed above, without personalization of the issue.
Currently, our clients only have a general problem - they need a plumber.
This is a broad niche because a person may be looking for something specific, like "installation of a water boiler" or "repair of pipes in the bathroom".
We'll create further ads that will focus on specific things.
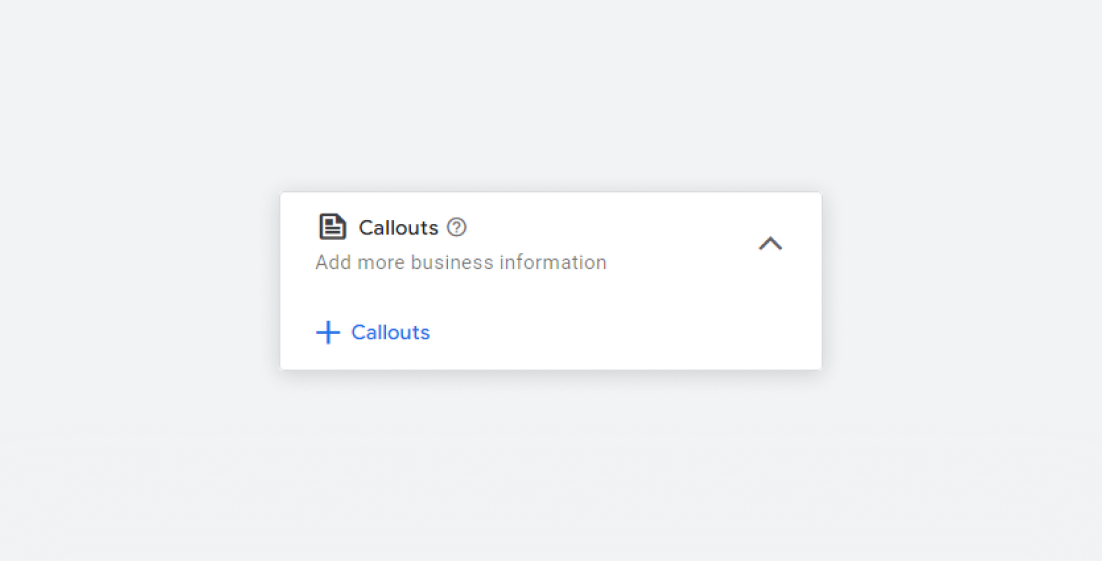
Therefore, in this "More asset types" section, we'll only fill in "Calls" - click on:
"+ Calls" → "+ New Call" enter your number and click "Apply".
Now when you've set up "More asset types", you can click "Next".
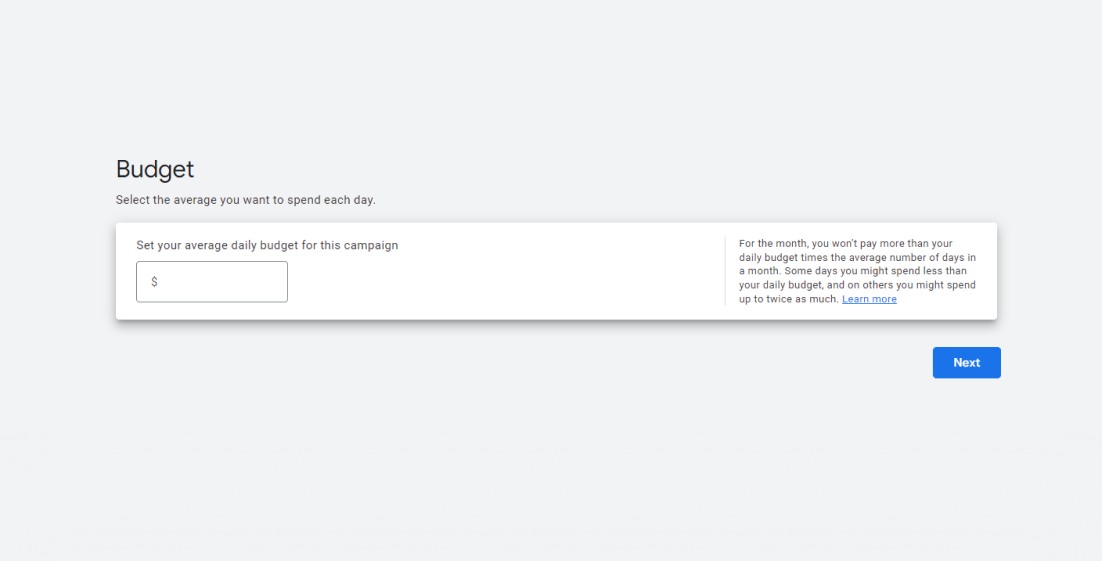
After you've filled in the information and moved to the "Budget" section, Google Ads will ask you to specify the campaign budget per day.
To set the budget, you need to know the approximate cost per click.
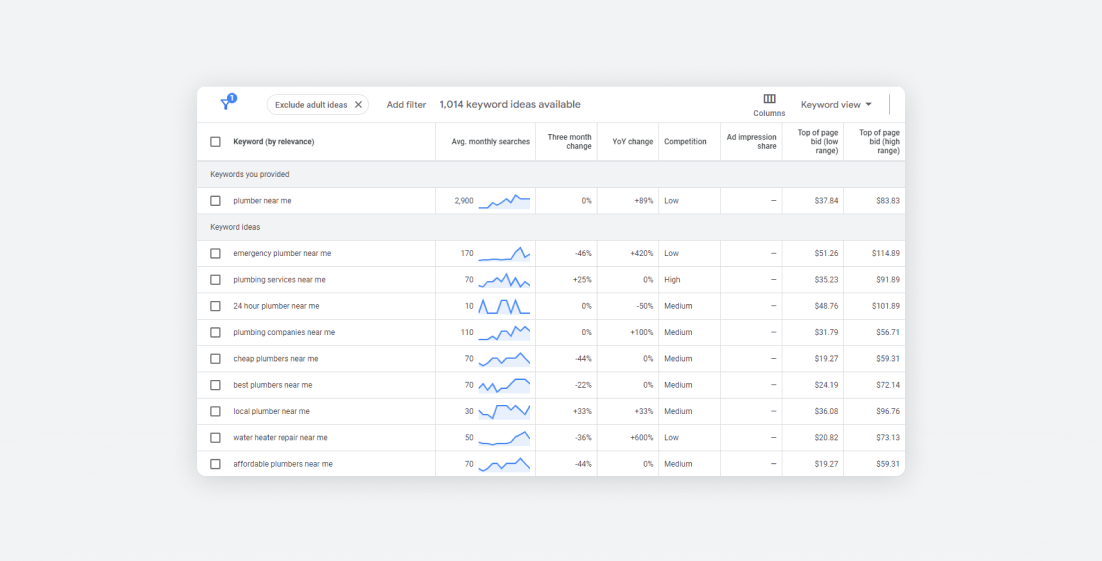
At the time of writing this article, the cost per click in Austin, Texas, for the keyword "Plumber near me" is:
Minimum: $37.84
Maximum: $83.83
We can use the average between $37.84 and $83.83.
Our average is: $60.84 per click.
We should understand that 1 click doesn't equal 1 client. It's very challenging to forecast how many clicks are needed to get 1 client.
Many factors play into this, such as how well your Landing Page is designed and understandable, how well the ad is written, and how competitive your prices are.
On average, for every 10 clicks, you might get 1 client.
Now, let's take our average cost per click for the "plumber near me" keyword, which is $60.84, and multiply it by 10. We get $608.4 per day to get clients once a day.
Yes, it might seem expensive, but don't forget about things like referrals and repeat calls. It's entirely possible that the client you acquire will tell their friends, family, etc., about you. Plus, it's quite realistic that this client will come back to you more than once and become a repeat customer.
Let's go back to setting our daily budget. Suppose you don't know the cost per click in your area. In that case, let's set it at $100 per day for now, and later you can check the cost information. We'll be able to set the daily budget and cost per click later.
Click "Continue"
You've completed the primary setup of the ad campaign.
Now, let's go back to the sections we skipped earlier.
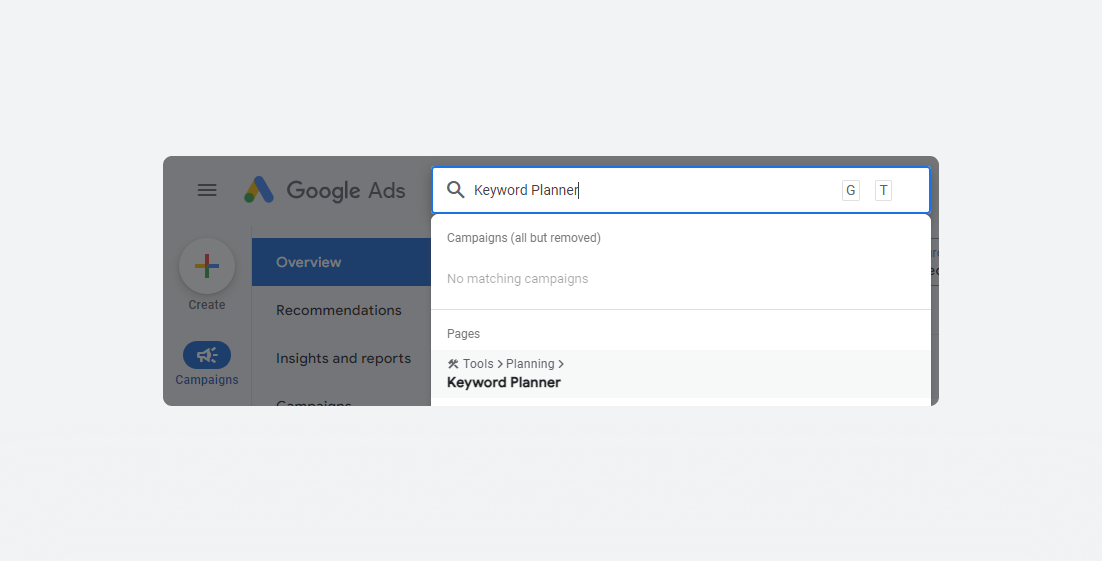
In the search bar, type "Keyword Planner"
Next, you need to select the "Discover New Keywords" option.
In the opened section, choose your location (initially set to the entire United States), and you should select your City, County, or ZIP Code.
Remove "United States" beforehand.
For example: we choose "Austin" → click "Save."
Now, in the search bar, input your keyword, for example: "plumber near me" Click on "Get Results".
In the opened window, we are interested in two columns:
Top of Page Bid (low range)
Top of Page Bid (high range)
These represent the minimum and maximum cost per click for this query.
Afterward, calculate the average. In my "Budget" section, I calculated the cost. You can return there and review the instructions again.
Now, to change the budget of our advertising campaign, we need to go to the "Campaigns" section (the leftmost menu). Then, you need to click on "Campaign Settings" (see below).

In the opened window, select the "Budget" option and set the daily budget based on your calculations.
For example, if you aim to receive an average of 10 clicks and 1 client per day, according to my calculations, you would need to set a daily budget of approximately $600.
Next, in the same "Campaign Settings" menu, we can set our Bidding.
Open the "Bidding" section.
Click on "Set a maximum cost per click bid limit" and enter the average value we calculated earlier.
In my case, it was $60.84.
Remember, you can also set a minimum value, such as $37.84 in my case.
You will still receive clicks, but they may be slightly fewer, and achieving results might be slightly more challenging. It's up to you to decide how much you're willing to pay.
You can specify both a minimum and a maximum value. This decision depends on you; I'm just offering a recommendation.
Once you've set your Bidding, click "Save" and close the menu.

In the search bar, enter the query "Keyword Planner"
Then, select the "Discover New Keywords" option.
(steps similar to the previous section).
In the opened section, choose your location, removing "United States" and selecting your city, County, or ZIP Code.
For example, we choose "Austin" click "Save"
Now, input your keyword in the search bar, for example: "plumber near me" and click on "Get Results".
These are the keywords that we will be adding to our advertisement.
You need to open two tabs in your browser:
1) One for Keywords Planner.
2) Another for Google Ads page → Campaigns → Audiences, keywords, and content → Search keywords.
Click on the blue plus icon "+" and select your campaign name from the list.
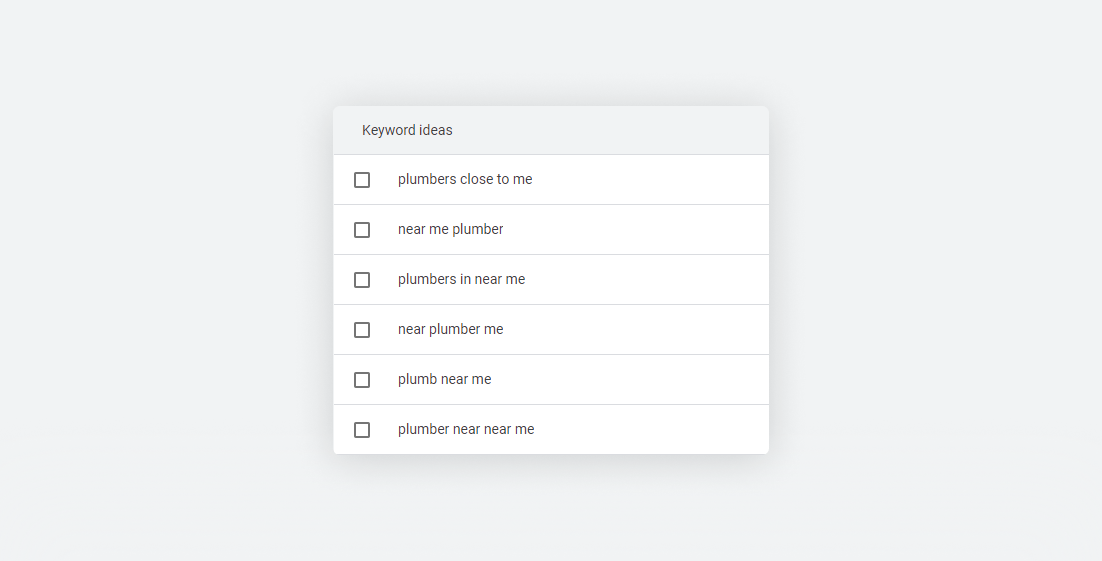
Now start entering your keywords here that you deem necessary and suitable for your campaign.
Remember the symbols we discussed earlier:
[keyword]
"keyword"
keyword
Try to specify only those keywords that truly relate to your business.
It's better to have fewer keywords than too many and end up without results.
I recommend having approximately 10-15 keywords per Ad Group.
An Ad Group is like shelves in a cupboard. Your cupboard is your Ad Campaign, and an Ad Group is like shelves in that cupboard.
On one shelf, we might put jeans, and on another, we might put shirts. Similarly, in Google Ads, we can create shelves for different keywords.
For example, we can create a shelf for "Pipes Repair" and another for "Installing a Water Tank" For each of these shelves, we'll use separate keywords, descriptions, and images. But more on that later.
Earlier, we created a campaign called "Plumbing General" - we'll only include general keywords.
For example:
[plumber near me]
[emergency plumber near me]
[plumbing services near me]
[24 hour plumber near me]
[plumbing companies near me]
[best plumbers near me]
[local plumber near me]
After adding the necessary keywords, you can click "Save."
Google Ads → Campaigns → Overview → Look for the blue pencil icon (✏️) and click on it.
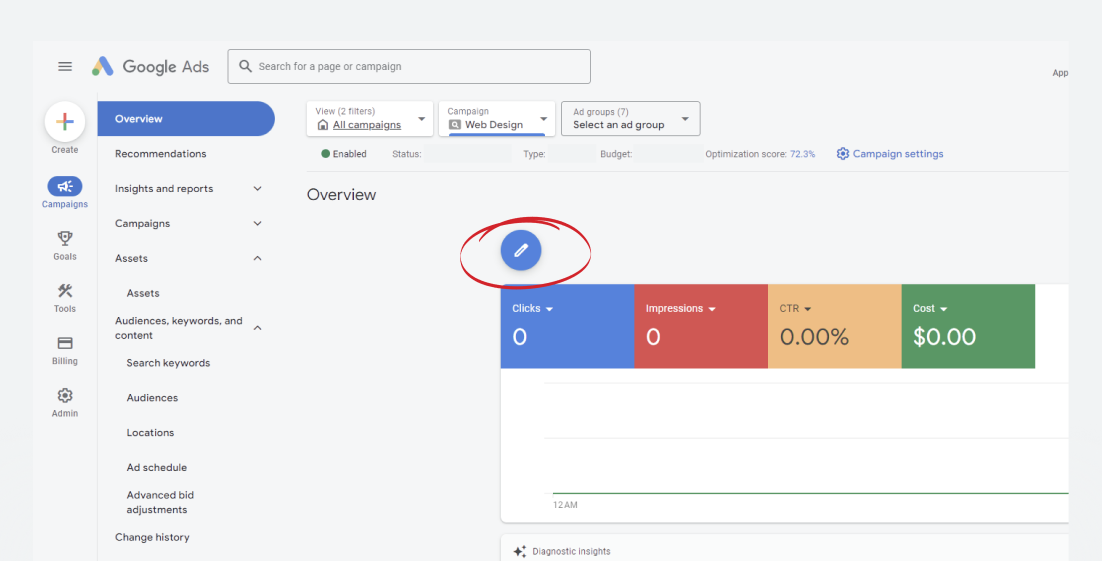
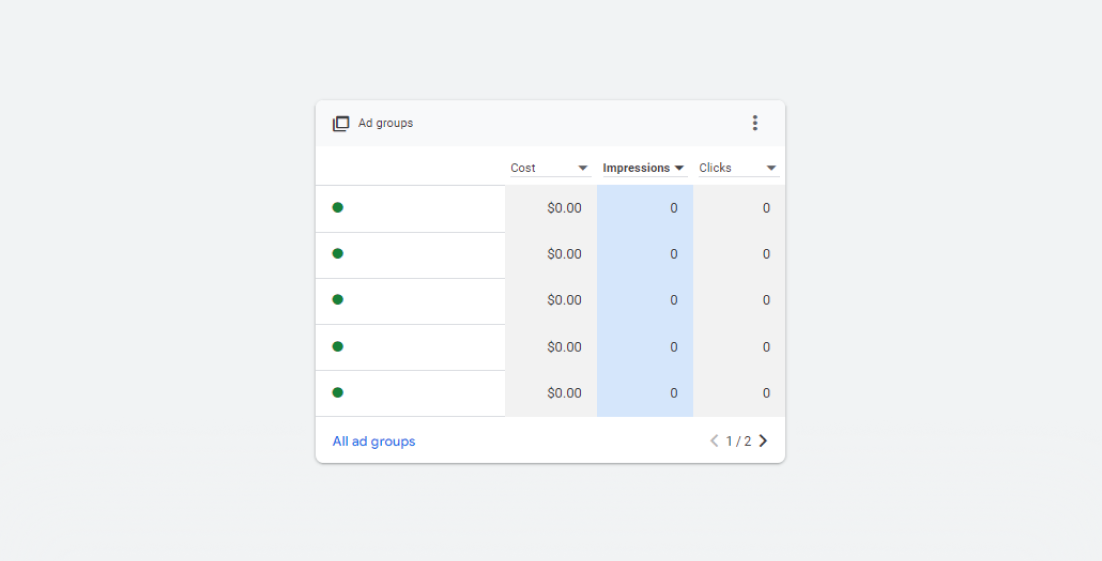
Click on the pencil icon: ✏️ and then select "New Ad Group".
Making the title (for example: Pipe Repair), we go to the "Keywords" section and create our keywords ONLY with queries that mention "pipe".
As I mentioned earlier - Ad Groups are like shelves in a closet, when you look into your closet, you know exactly where your T-shirts and jackets are.
Similarly, with Ad Groups - they allow you to personalize both the advertising and then you won't get lost in your keywords.
Back to the topic:
Open our Keyword Planner and enter a query related to "pipe repair" - look for the necessary keywords and add them to our Ad Group.
After you've entered your Keywords - click "Save and Continue"
Yes, yes, we've already seen this at the beginning of our journey :)
Here we need to focus on a specific keyword, for example, if we made an Ad Group for "pipe repair" then all these points that need to be filled in - should focus specifically on Pipe Repair.
Headlines, Descriptions, photos, etc.
This is necessary to personalize the user's query.
If a person searches for "Pipe repair near me" there is a greater chance that the person will click on the ad that is more personalized to their query "Pipe repair".
Such Ad Groups need to be created for different specific services.
For example, for "Pipe Repair" and "Elimination of leaks" it is necessary to create two separate Ad Groups.

Overall, this is basics that you need to know to launch a successful advertising campaign in Google Ads and start getting your first clients for the Plumbing Business.
If we missed anything - please, let us know.
We'll be glad to help you set up your advertising campaign or provide advice and answer your questions.
For more tips on marketing for plumbers and Google Ads for plumbing businesses, stay tuned to our blog!
We're here to turn your plumbing business into a roaring success!
You can contact us HERE
Sincerely,
Ubey Digital Agency Team.
#Plumbing #Plumbers #GoogleAds #DigitalMarketing #SmallBusiness #LocalBusiness #MarketingStrategy #BoostSales #BusinessGrowth #MarketingTips #GoogleAdsCampaign #TargetedAds #RetargetingStrategy #KeywordOptimization #GoogleAdsTutorial